12 years ago
1. Log in to your friendster account.
2. Point your mouse over 'profiles' menu then click 'photos'.
3. At the top right corner, click 'upload photos'.
4. In the upload photos area, you will notice that you had an 'existing album'. You may you use that option if you wish not to create another album, or you may create another album by selecting this button. 

5. To select photos to upload, Just click "Browse Files" shown in Step no. 4 Picture above.
6. A pop-up window will appear, shows like these:
7. Locate the file, or pictures (file extension example: .jpg, .bmp, .gif, .png) you want to upload, select the file, or click. (See pictures below.)
 Browse the location where you save the copies of your picture. It would be very easy to locate if you save it in "My Documents" folder.
 Picture shows that the file is selected, by clicking on the file, then click the 'Open' Button.
8. After Step no. 7, you will notice that your uploaded picture will appear below,
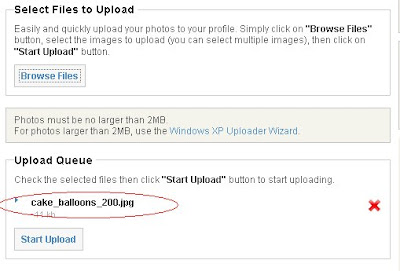
If you wish to upload 2 or more pictures, you may repeat the step no. 7 until you reach the maximum total of pictures you are uploading...
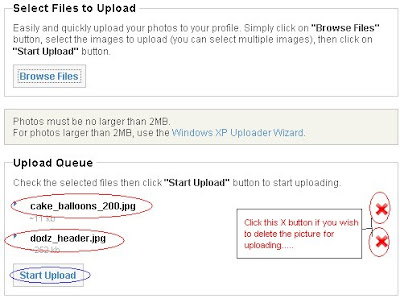 You will notice in the picture above that there are two items or picture in 'Upload Queue'. It means that you added another picture by performing step no. 7

 You will notice in the picture above that there are two items or picture in 'Upload Queue'. It means that you added another picture by performing step no. 7
9. To start uploading... Click "Start Uploading" Button.
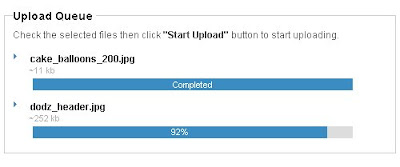 Uploading in progress... Once it reached the 100% its done...
10. The picture below shows that You had successfully uploaded your photos! Click "SAVE" button.
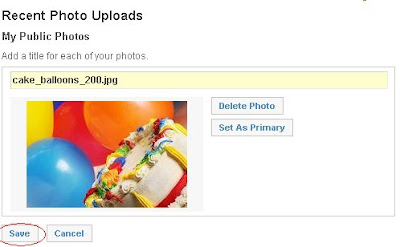
11. After successful upload friendster will automatically redirect you to your photo album.
To view your uploaded photo simply go to your profile and click "Photos" button.
12. Enjoy photo sharing.
Originally posted and made by kasperstroy@yahoo.com.ph
Copying files to a flash drive on a PC:
- Open My Computer and see which drives are shown. Most computers, for example, have a hard disk such as a C: drive and a few removable storage devices such as a floppy drive, a CD-ROM drive, and perhaps a zip drive.
- Insert the flash drive into the USB port and watch to see where the USB flash drive appears. Most will appear as removable storage, but some will instead appear as hard drives. Note the name Windows is using to refer to the flash drive ("Removable Disk (G:)," for example).
- Open My Documents or the location from which you want to transfer files to the flash drive. Select the files or folders you want to save to the flash drive by left-clicking on them. To select more than one, hold down the CTRL key while you click and select all of the files you wish to save.
- Right-click on the file(s) or folder(s) you selected, then select Send to, then select the name you saw appearing in My Computer for the flash drive ("Removable Disk (G:)," for example).
- When the copying is finished, do not immediately remove the flash drive from the USB port. Instead, left-click on the Remove Hardware icon
 located in the System Tray. A window containing a list of the USB devices will appear. Left-click on the Safely Remove Mass Storage Device line that matches your flash drive (for example, Safely Remove Mass Storage Device - Drive(G:)).
- When you see the following message appear in the bottom left toolbar, it is, as it says, safe to remove the flash drive from the USB port; you may close the message or ignore it, as it will close itself automatically:

Copying files from a flash drive on a PC:
- Open My Computer and see which drives are shown. Most computers, for example, have a hard disk such as a C: drive and a few removable storage devices such as a floppy drive, a CD-ROM drive, and perhaps a zip drive.
- Insert the flash drive into the USB port and watch to see where the USB flash drive appears. Most will appear as removable storage, but some will instead appear as hard drives. Note the name Windows is using to refer to the flash drive ("Removable Disk (G:)," for example).
- Double-click on the flash drive to locate the file(s) or folder(s) you want to copy to this computer. Select the files or folders you want to copy by left-clicking on them. To select more than one, hold down the CTRL key while you click and select all of the files or folders you wish to copy.
- Right-click on the files or folders you have selected and choose Copy.
- Open My Documents or the location to which you want to transfer files from the flash drive.
- Click on the Edit menu, then select Paste.
- When the copying is finished, do not immediately remove the flash drive from the USB port. Instead, left-click on the Remove Hardware icon located in the System Tray. A window containing a list of the USB devices will appear. Left-click on the Safely Remove Mass Storage Device line that matches your flash drive (for example, Safely Remove Mass Storage Device - Drive(G:)).
- When you see the following message appear in the bottom left toolbar, it is, as it says, safe to remove the flash drive from the USB port; you may close the message or ignore it, as it will close itself automatically:
Subscribe to:
Posts (Atom)

